Showing posts with label tutorial. Show all posts

Friday, May 10, 2024

UPGRADE ! - Lady Death's 2.0 Gear Tool (v2.0)©

 We have seen yet another change to the gear.

Just last week, on May 1, 2024, the devs patched in the new adjustments to the gear set effects. Now some of the sets activate already with just two items of the same type, which will help especially F2P or lower spenders to be able to get at least some extra buff. 

While I was reworking and refreshing the sheet anyway, this was the perfect opportunity to finally implement what has been asked by multiple people - a tracker for your own gear items. I am excited to introduce this too and hope it helps you with managing your gear and planning your setups better in the future. 

You can find the link to Lady Death's Gear Tool (v2.0)© at the end of the article.


Changes in Game

So, what has changed? 

In short, some of the effects on the gear now activate already if you have only 2 pieces. The requirement for the sets got adjusted accordingly and also the stats got adjusted to the effect that you will still have the same boost with 4 items of the same type.

Originally there had been planned some 2-set effects. However, when the game team launched the changes for 2.0, they had opted to put all effects in 4-sets. I believe this was done to avoid some OP mixes with classic gear, which originally I believe they did not intend to keep in the game. So in order to avoid having insane combinations (which some are still possible), they simply made the requirement for all effects to have 4 items with the effect to activate the buff.

This however made it quite challenging for some people. If you do not spend a huge amount of money, getting a full set of 4 items with the desired effect is not that easy. And the devs listened to the community - they reworked the system and I think it turned out quite nicely.

Some of the effects got turned into sets that require only 2 pieces to activate. You can now mix and match these effects. You can also double those effects to get back to the same buff that you had previously with the 4-set requirement. 

The effects that changed  into 2-piece Sets are:

  • Might: Physical Damage dealt by the commander's formation +5.0%
  • Lore of the Arcane: [This Formation] Burn, Poison, and Focus Damage dealt +5.0%
  • Fortitude: Physical Damage dealt by the commander's formation +5.0%
  • Agility: Initiative of the Commander's formation +5.0 during combat
  • Upkeep: [Commander] Recovery administered +3.0%
  • Siege Ladder: Siege of the Commander's formation +5.0%
  • all racial effects: When the commander's formation is comprised of race [Beasts/Dwarves/Elves/Evil Men/Men/Orcs/Trolls/Undead/Uruk-hai], damage received -5.0%


As you can see, the effects got halfed from their original values:

  • if formerly +/- 10%, they have now +/- 5% 
  • if formerly +/- 10, they have now +/- 5 
  • Upkeep went from +5% to +3%

I said you can mix and match the sets. What does this mean? 
Examples:
1. Hand w/Agility, Armor w/Siege, Head w/Siege, Accessory w/Agility will result in both effects activating. 
2. Four pieces with Agility will result in the effect activating twice, resulting in the same effect as it used to have before the patch update.
You can see in this screenshot how both Siege Ladder and Might activate and give the buff. 


However, as soon as you mix in just one piece of 1.0 (aka classic) gear, you do not get any set effect at all, even if you have two or three pieces of a 2-set.
Example:
Hand w/Dwarven Siege (purple hammer), Armor w/Siege Ladder, Head w/Siege Ladder, Accessory w/Drums of Moria Dwarven siege means the Siege Ladder effect (+5%) will not activate. You get only the buff from the Hand/Accessory pieces.
Or as in this screenshot, if you use the Hithlain with Elven Siege (Classic), you do not get the other set bonus. The game displays this by "graying out" the effect icon. 

The following effects have not changed and still need a full 4-piece Set as always:

  • Sharp Blade: Attack +20.0 during combat
  • Flay: Damage ignores 15.0% of the target's Defense
  • War Cry: This formation's damage dealt +20.0%
  • Perseverance: Damage dealt +2.0% each round
  • Thick Armor: Defense +20.0 during combat
  • Power Overwhelming: Damage received -20.0% when in the Stun or Madness status
  • Evasive Action: This formation's damage received -20.0%
  • Divide and Conquer: Damage received -2.0% each round

With the changes made to some of the sets, you can now not only get buffs if you don't have enough items to create a full set. It also enables you to adjust your strategy on what you are using and by deliberately picking two different sets to optimize your army setup. It means there es much more room to play around.


Changes on Lady Death's Gear Tool (v2.0)©

With this article I officially launch upgraded Lady Death's Gear Tool (v2.0)©. This is the second major update on my Gear Tool and I hope this makes it even more convenient for you to use and provides you an even better experience and support in planning and strategizing your army compositions.

So, what does it look like now?

There have been no changes to the basic tabs that you already knew. I updated the data collected from game according to the new changes. The tab "Effects" is now updated with the new values and information. 
There have been no changes made to the basic tabs "Gear" and "Relics". 

I have added a third tab "Filter your Gear" and now there can three people work with the tool at the same time. As always, please try to remember to never change any real data, the layout etc. Only filter according to what you're looking for and when you're done, please reset everything again for the next user to be able to find what they need. 

There are two brand new tabs added to Lady Death's Gear Tool (v2.0)©:

  • Instructions: 
    Here you find all information to the related articles with explanations and version history in the first section.
    The second section gives an overview on all available tabs with links to said tabs for your convenience. A table of content if you will.
    The third section provides a Quick Start instructions, which will allow you to get a small reminder on what to do where and how to use Lady Death's Gear Tool (v2.0)©
  • Gear Tracker©:
    This has been requested by many over time and finally I am able to launch it. Your own personal gear managing and tracking tool to support you with finding sets. 
    It enables you to inventory your own gear pieces, which enables you to plan better which gear changes to make and which effects will allow you to get set effects activated.
    I hope this is a tremendous help when redoing your gear and reduces the amount of Elven Craftsman Hammers used as now you will know what you have in your Items Bag.
Of course these changes are hopefully only the start and I will work on continuous improvement to make Lady Death's Gear Tool (v2.0)© even more useful over time. Suggestions and ideas are always welcome, but I can hint already that I have something in mind that will help with the planning even more. Putting this into reality will take a bit of work and time. So please stay tuned. 


How to Use the NEW Gear Tracker© 

Since it is going to take you a good while longer to work with the Gear Tracker than just looking up the ideal pieces, for this tab I made only one, which is protected from any changes.

This means you will have to pull a copy of the sheet first. You can do this either by adding a copy to your own Google Drive, or by saving the file to your computer.

With this I explicitly allow you to download and save a version of GT for your personal use. Please pay me the courtesy not to share your version, but a link to my Blog instead and let people get the link to the tool here themselves. Of course you are welcome to share links to specific articles if you want to.

Once you have the file copied you are good to go. You can duplicate the tab "Gear Tracker" as many times as you want and track the gear for all your accounts - if you have more than one of course.

Now you are good to go and enter the items you own. Just type in the number of times you have it and the tool will calculate also automatically for you how many items you have of which gear piece to get an idea how you're standing on refining your pieces. 

With the sections divided optically with different colours per quality type, alternating lines and frame dividers on gear slot, this should help to give you an easy overview on which sets you can go for to get the best out of your gear.

If you have any questions, remarks, or suggestions, please do not hesitate to reach out to me on Discord under ladydeath1. 

Lady Death's Gear Tool (v2.0)©


Sunday, February 4, 2024

2.0 Gear Tool - Update

The game's 2.0 version has not been out for all that long, but it underwent already a lot of changes during this time. 

To reflect these changes I updated and optimized the Gear Tool for you. 

Find the link to the Gear Tool at the end of this article.


What changes have been made?

1. The most significant changes by the devs on gear was the change of the race restrictions. A lot of gear was very restrictive in use and some races were really at a major disadvantage as to how many different gear pieces they were even able to use in the first place.

This has been changed and almost all gear pieces are now available for all races - with just a few exceptions for Elves, Orcs, Uruk-hais and large races (Beorning, Ents, Trolls). 

The result is that every commander has at least 119 pieces to choose from, with 127 pieces available in the game overall (or maybe 128 - one hears about a legendary piece that is extremely rare and almost never to see; if you find it, ss and show me the stats and all information - you shall get rewarded for it).


2. I provided for two tabs now instead of one tab where you can filter your gear. Again, please reset the filters when you are done so that the next person can fully use it as intended. However, those two tabs will now provide the option to work on it parallel without disturbing each other when there is more than one person trying to work on their gear.


3. I was lucky and pulled a very rare piece, the Estëcára. Of course I added the stats for this piece to the Gear Tool, so that those who are lucky enough to have one also can take this piece into account.


4. Relic tab - I changed the stats all to Main Stats since there is not a separate "Head Stat" affected by refining gear as with the regular pieces. Relics are different from other gear pieces in that every strengthening will pick one random Main Stat to be upgraded and the Refining will upgrade the Special Effect. To reflect this in the table I changed its optics.


5. A new Commander (Bard) has been released not too long ago. I added the new data for his relic accordingly.


That was it already. I hope you enjoy the newly updated Gear Tool and may it help you make the best choices for your commanders.

2.0 GEAR TOOL (v. 1.1)


Tuesday, November 14, 2023

New 2.0: Gear Tool - Your Way to Finding the Gear You Need

The new 2.0 update has been out for almost a week now. You have been struggling to find the right gear? Don't worry anymore. In my Gear tool which has a complete list of all available pieces you find all gear, its stats, all possible special effects and also a complete list of all the relic items.

Read on to find out how to use the Gear Tool and find the link at the end of this article.


Introducing the Tool


When you open the tool you will find 4 Tabs:

  • Filter your Gear - This is open to edit, which allows you to filter for different stats (see explanation below)
  • Gear - all the gear, but protected. Here you can safely look around and double check the data in case the first tab gets botched.
  • Effects - a list of all the effects available on the regular gear
  • Relics - a complete list of all the relics with their stats and special effects as stated in game


Which Data is in the Tool?

The list contains all the information about the gear that you need:

  • Rarity colour coded - Legendary, Exquisite, Fine, Superior - every gear piece is on the list. There may be one or two extremely rare ones missing that you can only get through tips for example.
  • Type colour coded - Hand, Head, Armor, Accessory
  • Head stat - The stat that is indicated in the Top part of the gear card, directly under the title (1). This is the stat you influence by refining your piece. The refinement status of your gear is indicated by the border. You can now refine your gear independently of the strengthening level (star level). Possible stats are [Commander] HP, [Commander] Damage and [Commander] Command.
  • Main stats - These stats make the body part of the gear card (2) and can be influenced by the Strengthening status or "Star" Level of your gear. Possible stats are [Commander] Attack, Focus, Damage or Initiative and for [Units] Attack, Defense and Siege.
  • Special Effect - These are the set effects (3) that have to be the same for all slots on your commander in order to activate. The stats are fixed stats, which means you cannot influence them by strengthening or refining your piece. There are 14 different effects available on every piece (except the anniversary set, which comes only with "Siege Ladder"). Furthermore there are some racial stats, which can be found on select pieces - you can see that in column O "Has racial special effect" where you will find indicated which racial effects are available for the specific piece.
  • Race restrictions - if the gear has any race restrictions indicated (the case for most pieces), you will find here which races can use the piece.


How to Use the Filter

In the first tab of the tool, "Filter your Gear", you have the option to filter by the different columns. The line with the filters is marked green. Here you can click on the arrow-like lines and then pick what you want. In most cases you would simply pick for which stat you are searching and then untick the option "blank" to show all gear options that carry the stat you are looking for.

Let's say you are looking for pieces that carry the stat [Commander] Command as you want to have more troops in your formation.

  • Click on the filter in column F 
  • Unclick "Blank"
  • Click on "OK" 


Now you see only all the pieces that carry this specific stat.

You could now filter on further stats to limit the choice even more.

If you look at the green row, you can see which columns bear a filter. To remove a filter simply click on the filter icon and then click on "Select all" and on "OK". 


This was it. I hope you have fun using the filter and wish you success finding the best gear for your commanders.


Policy & Link

As this tool is public for everyone to access without limits and the Filter tab is open for edit, I would like to set a few rules on how to use it.

  1. Do not make any other changes on this tab aside from using the filter option.
  2. If you accidentally make a mistake or if you notice that someone else might have made a mistake, please reach out to me and let me know so I can fix it again for everyone to use it. I will check in every now and then, but I might not catch it before you or someone else needs it. You can contact me via this Blog or on Discord @ladydeath1. 
  3. After you used the filter option, please be so kind and reset the filters for the next user.
If you have any questions, let me know and I see how I can help you.
Should you have any gear pieces that are missing from this list, I would appreciate if you could send me screenshots of the basic gear stats and the bottom of the available special effects list.

And now, enjoy the Gear Tool.


Wednesday, May 31, 2023

Step-by-Step: New Relocation + General Tips

With the new patch from this week the relocation mechanic changed. In this tutorial with background information and tips as well as a Step-by-Step guide you will find what is new, which rules there are (and have been) and what other things to consider when you relocate in order to optimize your strategy.

Relocation Token
Relocation Token


Why relocate?

You start off in your server with a random spawn spot in the starter region(s) for your faction. Usually that keeps you occupied with the resources available around your location for quite a few days - depending on the overall server/faction population. 

After a while you either run out of resources because there is competition or you simply used it all already, or you want to be closer to war etc.

Almost 1h reinforcementRelatively close proximity
Reinforcement Time & Distance on the Map

Imagine you play in Lindon, spawned in Harlindon and have to fight war against Gundabad. If you want to fight, you need to have your base reasonably close or you will not be able to sustain the battles as reinforcing times will just take way too long. Especially in the beginning when your commanders are still growing and your ring tree is not progressed too much your marches are typically significantly slower than in late game. Moreover, if the enemy destroys your fort, your marches will walk home for hours potentially.

So, let's look into the basics first.


Game Relocation Rules

The rules for relocation as such did not change:

1. Foundation

  • You need a square of 9 tiles, 1x1 each.
  • The tiles have to be arranged in a 3x3 square. 
  • The tiles have to be resource tiles (level 1/h up to 150/h)
  • Any tiles surrounding those 9 tiles cannot be: water, mountain, other settlements, control points or similar, crossings or tunnels
    Allowed are: Fellowship/Warband Fortresses, 2x2 resource tiles, etc.
  • None of the 9 tiles can be in conflict (you will see a timer if a tile is in conflict) or haunted by a grudge (in Path of the Death) 

    One tile distance to water One tile distance to a neighbour
    Two examples to show the requirement of one tile (or more) distance to water and a neighbour. The same rule applies to control points, crossings, tunnels and mountains.

2. Target region restrictions

  • The foundation meets the target region restrictions
  • The region you want to move to is controlled by your own faction
  • It cannot be in Amon Lanc (Dol Guldur region), even if it is owned by your faction

3. Neighbouring Settlements

  • You need to have at least 1 tile distance to other settlements
  • This means: you cannot touch others.

Base surrounded by regular tiles
Base with Buffer Zone


As you can see, a fort (whether your own or another player's) can be directly next to your base. 

Also a 2x2 resource tile has no impact on your relocation.


What is new?

Temporary Camp Costs
Temporary Camp
The new part is that you have to build a Temporary Camp first. This camp occupies the whole foundation. Building the Temporary Camp will cost you:

  • 10,000 Wood
  • 10,000 Ore
  • 20,000 Stone
  • 1 relocation token
  • 2 hours time

Limitation: you can only have one Temporary Camp at a time. 


What do those new rules mean?

It is pretty simple: you cannot just build a foundation as you're used to and directly relocate. You can build the Temporary Camp only in owned regions. This means, you cannot immediately relocate into a region that you just took over from another faction. You have to build your camp first, which will take 2 hours time and in those two hours the faction that was just evicted from the keep might be able to "get in the way" of your plans. 

At the end of the day this means you have to strategize a bit more, regardless on which side of things you are. Make your plans accordingly. 


Relocation Tokens


In seasons 1 and 2 it is fairly easy to get them. You can buy them daily in your Fellowship/Warband Store. They cost 500 Contribution Points, which you get very easily just by taking tiles and helping your team's members.

Warband/Fellowship Store S1

Starting in season 3 there are more items in the store and they rotate randomly. This means that it might take a few days (or sometimes more) to get a relocation token. The tokens do not transfer to other seasons, which means you have to buy them every season again.

Relocation Token
Relocation Token
Sometimes it happens that you need to relocate quickly and don't have a token. In that case you can spend 500 gems to buy one. The option shows when you try to relocate (or now to build the Temporary Camp) and you have to confirm the purchase for 500 gems.

Many do not wish to spend gems for relocation. While it is more economic to get them from the store (make sure you keep always 500 Contribution Coins on stock for when a token appears), it might be necessary to spend gems on it regardless. Luckily the game offers free gems frequently (weekly maintenance 200 gems, weekend boss events 400 gems, game progression, red book challenge, other events). If you play in a fairly active group, you might have to prioritize the relocation in order to help your team. However, I recommend to check daily in your team's store to make sure you don't miss the "free" tokens. 


Step-by-Step Guide

  1. You start by laying out your foundation. Take 9 resource tiles that are in a 3x3 pattern. The tiles that work are resource tiles producing power of 1/h up to 150/h.

  2. Click on the center tile to display the menu - you want the option "Build"
    Owned Tile Menu
    Tile Menu

  3. In the build menu you have several options. Depending which server/campaign you play there might be more or less options to choose from. You need the option "Temporary Camp".
    Make sure you have enough resources. This might be an issue in the early game or when you are at war and do not have many resource tiles. 
    Build Menu
    Build Menu

  4. Confirm building the camp and then it's time to occupy yourself with other things. Either take more tiles, go sweep mobs or do the dishes. You have 2 hours to kill. 
    Temporary Camp Building
    Temporary Camp Building

  5. Once the Temporary Camp is finished, you can come back and click on it again. Now you see the option "Relocate" in the menu. 
    Temporary Camp Finished
    Temporary Camp Finished

  6. Oh, look, I can't relocate because not all my armies are at home. Let's quickly amend this. 
    Armies not at Home Summoning Armies
    Armies are out of the base - Summoning the Commanders to come home

  7. Now that all my armies are at home, I can go back and finally do the relocation. 
    Relocation Requirements Fulfilled
    All Requirements Fulfilled

  8. I get another confirmation window. Please take into account that you cannot relocate for another 3 days. You will have a cooldown on it. 
    Confirmation to Relocate
    Confirmation to Relocate

    Furthermore you might want to consider that any protection you might have will disappear (unless they changed that with the new patch).
    Relocation Successful
    Relocation Successful

  9. And we're done. Now I can go fight, sweep better mobs, take fresh tiles, enjoy the new view.

Other Tips and Tricks

When you want to fight in battles, typically you want to be as close as possible to the battle field. However, there are quite a few things to consider in order to have best possible position. 

  1. When you relocate to the front, you might want to choose a spot that is not too exposed. If your enemy uproots you, you will be "out of commission" for up to 3 days until you can relocate again.
    - e.g. good spots for keep defense would be on the other side of the keep. If it is attacked from an enemy from the West, you relocate to the East side to have a buffer between your base and the enemy.
    - Sometimes the map structure offers awesome spots to relocate somewhere safe due to it being on an isle or separated otherwise by geographical structures. If the enemy cannot reach your position, you can keep defending without any worry.

  2. Sometimes the region is rather small, but you want to fit in as many active players as possible to get a good handle.
    In this situation everyone is asked to be very mindful with choosing the position of their landing pads (foundations). Be strategic about where to "park" your base so that you can fit as many as possible into the limited space. 
    Here I have an example which is not ideal. The base blocks out two spots instead of one. Just one row to the South-West (closer to the warband fortress) and one more player's base would have fit between that player and the mountain range. 

    Problematic Relocation with Suggestion to do Better
    The markings show where the base should have gone to make sure to use the space efficiently. The player in the top right corner made sure to have enough space between him and the other base. There is place for one more place.

    Especially in new season 1 or 2 servers it might be helpful if an experienced player guides the players with choosing the perfect positions. Once you are relocated there is no option to "quickly" fix it. 

  3. Timing - Since you will be on cooldown for 72 hours (= 3 days), you want to make sure that you know your team's plan and don't waste a relocation token just to find yourself unable to fight in a meaningful way. 
    In order to help your team you want to be as close to the action lines as possible. Sometimes it pays off to hold out rather than just relocating for relocation's sake.

I hope this guide and explanations gave you a good overview over the relocation rules and strategies to use when relocating your settlement. 
If you have any questions, please let me know in the comments or message me privately. 

Monday, May 15, 2023

Basics: Bag End

 After your second season ends you will be "migrated"* to Bag End. And then after every following season again. Bag End is the place to take a break, to rest, to find a new group, join with friends. 

*to be migrated: the process of the game team transferring your account from a server to Bag End or vice versa.

When you hit Bag End (BE) for the first time you might be wondering where all the stuff is that you know. Well, you won't have your settlement in BE. Since one of the newer patches you have a little "cottage" on a map, but it's not the same. 

When you first enter your account after migration to Bag End, you will get a short guide with the highlights on what to find where. Many might just click that away because usually we find it annoying and we just wanna rush it. Later we might regret that because we simply cannot find what we're looking for. This is why below you will find a complete guide on BE and what to do there as well how to do it.

What is Bag End?

You could think of Bag End as sort of a lobby. An entryway and waiting room for the game. You cannot really do much while waiting. The purpose is to gather in teams and register for a new campaign - ideally as soon as possible. However, sometimes we need a few more days of a break or want to join a campaign that is not on offer currently. So the waiting might take some time in certain cases.

What can you do in Bag End?

As mentioned above: not much. However, you can prepare, play on your builds, work on your gear, view the season store and exchange items there, and a few other things. But most importantly: you register for campaigns. 

The menu options are a bit reduced. You have 

  • Access to the map, with a small cottage that bears your name
  • Access to the season store and your season medals
  • Access to your inventory (Pack)
  • Access to your Team (if it says "Join Team", don't panic, you might be in a team and the button not displaying it correctly)
  • Access to your commanders
  • Access to the Mathom House including Red Book Challenge, Free Daily Mathom Chest (up to 21 days), Commander Recruitment, Event Chests
  • Access to your Notification Center
  • Join Campaigns
Aside from this you have also 
  • Manage your Account & Settings
  • Access to the Store (Daily Mathom Clearance, Event Offers, Periodic Benefits, Gems)


Top Left Corner

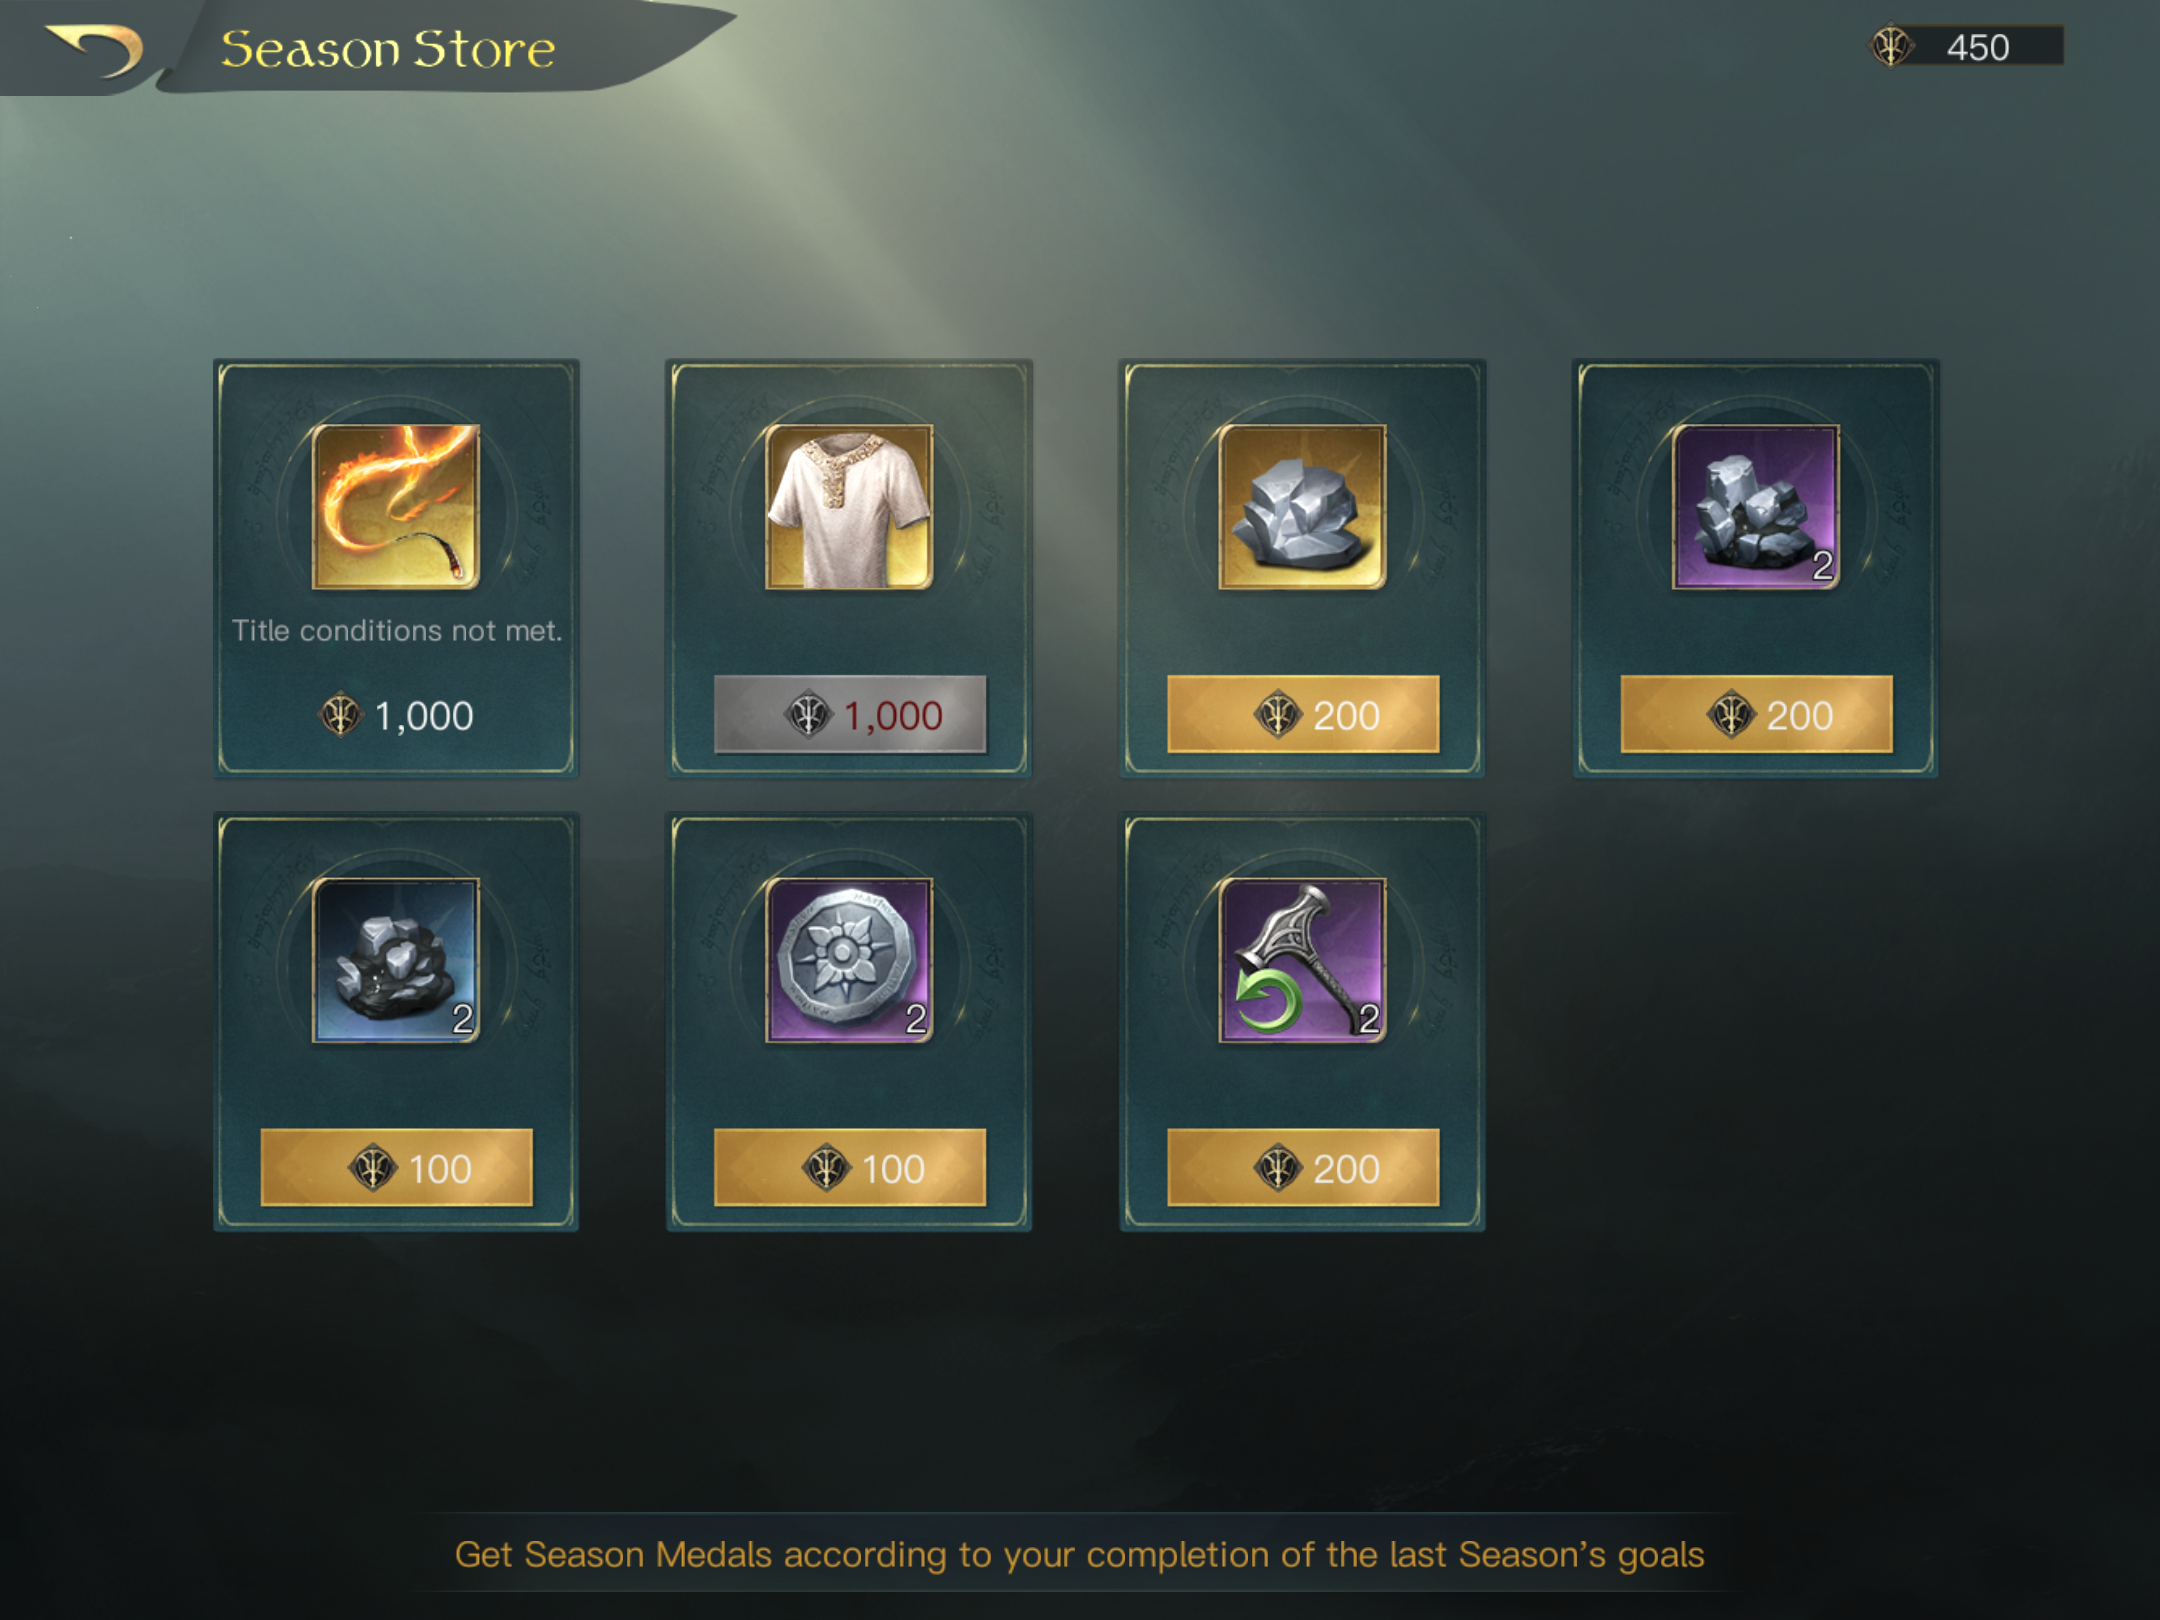
The Season Store

After you played last season - hopefully successful - you will want your rewards unless you got them already on your last day on the server. The season store is a little bit hidden in Bag End. You will find it when you click on the ❔in the top left corner of your main screen in Bag End. 

This will take you to another screen. On the top right you can see the Season Medals you have available to spend and in the broad bar below you see the icon "Store" which will take you directly to the season store. Spend your Season Medals wisely.

Bottom Left Corner

The Map

There is not much going on on the map. Everyone has a little cottage on a 1x1 tile and you can relocate - if you spend gems. It isn't needed to do that at all. I doesn't cost as much as in server (only 50 gems), but if you are ftp or low spender, I would recommend against it as there is no added value to it.


If you want to relocate, you can only do so in the blue area in the West. Any tile that is a 1x1 works. It does not have to be connected to any other purple tile. 

As you can see this map is much bigger than the map you know from most seasons.

You can also explore the map and the structures' names and short description if you are interested in that. 

Chat

As in season you also have the chat option in Bag End. As you're used to it there are two tabs: one for any group chats and the other for private chates.

In the tab with the group chats you will find World Chat, Team Chat (if you are in a team) and all the group chats that you may have created (maximum 2) or joined. 

However, old conversations from the season will be purged. All your chats will start empty with every migration to Bag End or into a new server. If there is important information, better take note or it will be lost once you migrate again.


Bottom Right Corner

The Pack (Inventory)

Your Inventory has a different name in Bag End. It is the same as in season though. You can fully access all gear and respect items and work on them. You can open gear chests or respect items chests, etc. You cannot use any boosts should you have any that transfer across seasons. Most of them are only valid in the season you are in, but sometimes it's possible that you get your hands on a boost that is not tied to a season. While in Bag End, you have no use for them. 

If you are a spender and run into the issue that your inventory is full, the game will offer you to store some gear items temporarily. You will get these items sent into your Notification Center, where you can pick them up in your next season.

Team (Join a Team)

Next to the Pack button you find the access to your team. At the moment this button always shows as "Join a Team", which might be confusing if you are in a team already. Don't freak out. Just click it and you will see if you are in a team or not. If you are in a team, it will display the team's code, whether it is Public, (visible for) Friends (of the leader) or Private and how many members are in the team. The maximum amount of members per team is 100. 

Furthermore you can see if there is any description of the team.

On the bottom you see another tab called "Members". In this tab you can see all the team members listed. There is no particular sorting of members that I could find yet. In the column "Relationship" you can see if the member is listed in your friends list. Lastly, in your own line you can see three dots in the column "Use". If you should want to leave the team, this is where you can do that. 

As Leader of the team the column "Use" also has other functions. Here you can dismiss members if they are not supposed to be on the team or transfer leadership of the team. Be careful with this and read the pop up window! You don't want to transfer leadership accidentally to a member that you really wanted to remove from the team. 

Commander

With the next button in line on the bottom right you find all your commanders. Here you can access every single commander, regardless of their alignment. You can do everything that you can also do in game, including viewing the tasks for uniques, etc. Please stay tuned for a more in-depth guide on the commander page.

Mathom House

The bigger button in the far right corner on the bottom is your way into the Mathom House. Enter with caution! The temptation to spend can be big. 

The Mathom House provides you with everything that you also have in season: 

  • The Mathom House itself with all the tempting chest offers
  • Commander Recruitment where you can see all your commanders on the map and gift them their respect items
  • The Red Book of Westmarch, where you can do the Challenge. Don't forget to come back here. Gifts in form of a free Mathom Coin, 100 (or 200) Gems and 5 (or 10) Mathom Vouchers await you when you finish the challenge successfully.

Notification Center

Directly above the big Button you find the Notification Center. Here you receive all relevant messages like the weekly maintenance emails from the game team, notifications when your team's leadership has been transferred, notification if you were removed from your team as well as when your team registered for a campaign. You will also find the Purchase emails if you made any. 


Top Right Corner


Gems

You see your gems balance as you know it with the button to add more gems if you decide to do that. This ➕ button brings you directly to the Store.

Season Overview

Underneath the gems symbol you find a smaller button with a timer. This is the quick access to your last season's overview and from there you can also get to the Season Store as well as to your Season Journey if you want to watch this.

The timer displays for how much longer this direct link is accessible. 

Settings

The little gear ⛮ button to the right of your gems balance, next to the ➕ button will take you to your settings. Here you can change your name for 500 gems (you can change in Bag End and also in each server) once per season or once per stay in Bag End.

You can also change your Avatar and your Personal Profile Message.

In your Profile you can see your Season Journey and if you click on "more", you can click on the banners and see the season's Summary. 

Lastly you find at the bottom of the screen

  • Settings (Sound&Display, Notification, Language & Game Settings)
  • Customer Support
  • Tutorial

Store

The button with the gems sack in the top right corner will also take you to the store. 

The Store in Bag End is a bit more reduced as all the season-relevant options are not available while you are not in season. 

Event

Lastly, there is also the Event button that you know from the game in season, but also here there is not much to find as there are no game related events going on in Bag End - at least so far. 

However, you can find the links to the FB Group, FB Fan Page, Discord and YouTube if you want to check these out while waiting. 


Center

In the center of your screen, next to Bilbo, above his desk, you find the most important button. The button that will bring you to 

Campaign

... registration. Here you find all available and currently unavailable campaigns for register as well as a team list to the bottom right of the screen. 


For a comprehensive guide on how to register and an overview over the campaigns please read my next article to be published shortly ...

Saturday, April 29, 2023

Step by Step: Gear effects and how to change them

There are over 100 gear pieces in the game.

Few Superior (green), a few more Fine (blue), a bunch more Exquisite (purple) and plentiful Flawless (gold). 

They all come with different basic traits (might, focus, speed, army buffs) and apart from superior gear they also come with different "Special Effects". Both Fine and Exquisite gear come with 4 different options each while Flawless comes with 5 different options. The different special effects are suitable for different commanders or different situations. 

Most people do not have a bucket full of gear they can simply grab into and apply whatever and whenever they need it. We have to strategize what special effects to choose because once refined we're stuck. 

Except we're not!

The game provides us with different options on how to regain what we put into a gear piece. 

In this post you will learn how to find out what pieces you have and how to salvage these and switch Special Effects as you need them. 

Switch Special Effects

Let's say I want to change the effect from Elves Strength to Sustain. Now, lucky as I am, I have one Sustain Harp in my inventory.

In order to do that without losing a piece for refine, we need the following "ingredients":

  • The original 5-star refined piece, which will be broke apart
  • The basic target piece with the desired Special Effect
  • One expendable piece or worn-out piece.
A friend of mine, Karchilles, calls this the 10+1. In every max refined piece are a total of 10 pieces of the exact same item: in my case the basic Harp with Elves Strength and 9 Harps that I used to refine it.
These pieces were used for the different levels as follows:
  • 1-star: 1 piece, 
  • 2-star: 1 piece, 
  • 3-star: 2 pieces, 
  • 4-star: 2 pieces
  • 5-star: 3 pieces
=> 1 + 1 + 2 + 2 + 3 = 9 | plus the basic piece is 10

To switch without losses you need one extra (10+1) to do that. So, whenever you have a total of 11 pieces of the same item you will be able to play the "switcharoo" as often as you desire. 

Here is how you do it - follow the instructions step by step:
  1. You strengthen the "+1 piece" - your target piece - once


    In my case I didn't have a worn-out piece, but I was able to spare the Fiddle as I won't need it. 

  2. Now you refine this strengthened piece with your max refined piece once. Don't be afraid, it can be scary when you do it the first time, but you will not lose anything.

    If you do it the first time, you will get a popup-window twice:
    - One informs you that you will receive all pieces used for strengthening as worn-out pieces into your inventory
    - The other one informs you that you will receive all extra pieces used for refine as actual items into your inventory
    You have the option to tick a box that says "Don't remind me again", which I did. That's why I cannot show you this box here.


    This is what the refining looks like - you can see that it says 10/1 when you choose the max refined piece.


    All the other items are transferred directly into your inventory. Let's go check and have a look at it.


    And there they are: 9 shiny "New" pieces and the 19 worn-out pieces - everything is in the inventory as promised.

  3. The next step is easy and just the same as you have always done it: strengthen to max and use the worn-out pieces. You will need
    - 2-star: 2 pieces
    - 3-star: 3 pieces
    - 4-star: 5 pieces
    - 5-star: 8 pieces
    in total 18 pieces, which leaves you with 1 worn-out piece like you had in the beginning.

  4. Time to max refine our item.
    You will need 8 pieces (1+2+2+3 for stars 2-5). This leaves you with one extra piece like you had at first. You still have your 10+1. 
    And this is our result: We switched our Harp of Lothlórien from Elves Strength to Sustain.

Obstacles

As we all know, life isn't always as perfect as we'd like it. So it happens that you have a +1 piece in your inventory, but it does not have the trait that you need. In this case you might still be able to get the piece that you need. If you used a piece with the needed Special Effect for refining your maxed item, you are still good to go, but first let's ....

Look and Find Out

You go to your inventory and click on the maxed item that you have already.

Now you click on the little book in the upper right corner.

The game opens up a Window where you can find three tabs:
 - Recommended Builds - the top 3 commanders that most commonly use this gear piece and with which special effect (Attn: This is not necessarily a good advise)
- Special Effect - all available special effects 
- Materials - the materials that have been used for this specific item in your inventory

As you can see in my case I used 19 worn-out pieces to strengthen the basic gear piece as well as the individual 9 Harps of Lothlórien that I used to refine it. 
All special effects that have been put into the basic piece will be recorded with the special effect they have and if the basic piece is disassembled, you will get back the exact same special effects returned into your inventory.

By clicking on the individual pieces you get to see which those are. 


Well, hello there, we found a Sustain Harp. Perfect. Let's free it up!

With this knowledge we can now do the swaps as often as needed. To get your needed item you first do the above process steps 1 & 2, but after we deviate:
  1. You strengthen the "+1 piece" - your target piece - once.

  2. Refine this strengthened piece with your max refined piece once.
    You have now a 1-star refined piece, 19 worn-out pieces and 9 freed up pieces. 

  3. You find the item you really want and strengthen it once - like in step 1. 

  4. Now you refine this strengthened piece with the first 1-star refined item. This step is needed to free up the piece that you used to refine it so you don't lose one refine piece.
    Your inventory has now: the target item 1-star refined, 19 worn-out pieces and 9 refine pieces.

  5. Strengthen your item to 5 stars.

  6. Refine your item to 5 stars. Here you can choose to leave any one of the items. If you want to save some time for the next round, think ahead and try to keep that item back, which you might need at a later point. If you accidentally don't think of it, no problem, then just do it the long way with freeing it up first. 
And we're done! 

Last not least one thing to keep in mind when you refine a piece with an already refined piece:
The basic item is the one which will be used to refine and the pieces that have been used to refine this piece will come back into your inventory.
So, if my Elves Strength Harp were refined with 9 Sustain Harps, I would receive 9 Sustain Harps in my inventory and the Elves Strength is in the now refined item. 

I hope this helps you manage your gear without losing items unnecessarily to worn-out pieces.